Disclaimer: We may earn affiliate commission from qualifying purchases at no extra cost to you.
To thread a Brother sewing machine, start by winding the thread onto the spool, threading it through the machine’s guides, and finally pulling it through the needle eye. This process can vary depending on the model, so it’s important to consult your machine’s manual for specific instructions.
With a little practice, threading your Brother sewing machine will become a quick and easy task.
Sewing is a fun and rewarding hobby, but it can be frustrating if you don’t know how to properly thread your machine. Threading a Brother sewing machine is relatively straightforward, but it’s important to follow the correct steps to ensure your machine runs smoothly and your stitches look their best. In this article, we’ll provide a brief overview of how to thread a Brother sewing machine and offer some tips for troubleshooting common issues.

Credit: www.wikihow.com
Types of Brother Sewing Machines
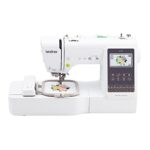
Brother offers a variety of sewing machines to meet your needs. Each type has its own unique features and capabilities. First, there are basic models that are perfect for beginners or those who rarely sew. They come with essential features such as straight stitching, zigzag stitching, and a variety of stitch lengths. Second, there are computerized models that are ideal for more experienced sewers. These machines have many advanced features such as different types of automatic buttonholes, embroidery stitches, and LCD touchscreens. Lastly, there are heavy-duty models that can handle thicker fabrics like denim or leather. They come with additional features such as a needle threader, a drop-in bobbin system, and a variety of presser feet. Understanding the different types of Brother sewing machines and their features is important when choosing the right machine for your sewing needs.
Preparation Steps
Before threading your Brothers sewing machine, ensure that you have all the necessary tools, such as thread, needles, and scissors, listed below. To prepare the sewing machine for threading, begin by turning off the power switch. Then, raise the presser foot and the needle to their highest position. Next, open the bobbin cover and insert the bobbin into the bobbin case, ensuring that the thread is correctly threaded through the guide slot. Lastly, release the clutch and turn the handwheel toward you, making sure that the needle passes through the bobbin case. With these preparation steps completed, you are now ready to thread your Brothers sewing machine.
Threading the Bobbin
Threading the bobbin is a crucial step in using a Brothers Sewing Machine. It ensures the bottom thread is properly wound and ready to stitch. First, locate the bobbin case and remove it from the machine. Next, wind the thread around the bobbin a few times and insert it into the case according to the manufacturer’s instructions. Then, feed the thread through the guiding slot and hold onto the end while bobbin winding begins. Once the bobbin is fully wound, place it back into the machine. By following these simple steps, you can ensure your Brothers Sewing Machine is ready to create beautiful stitches with ease!
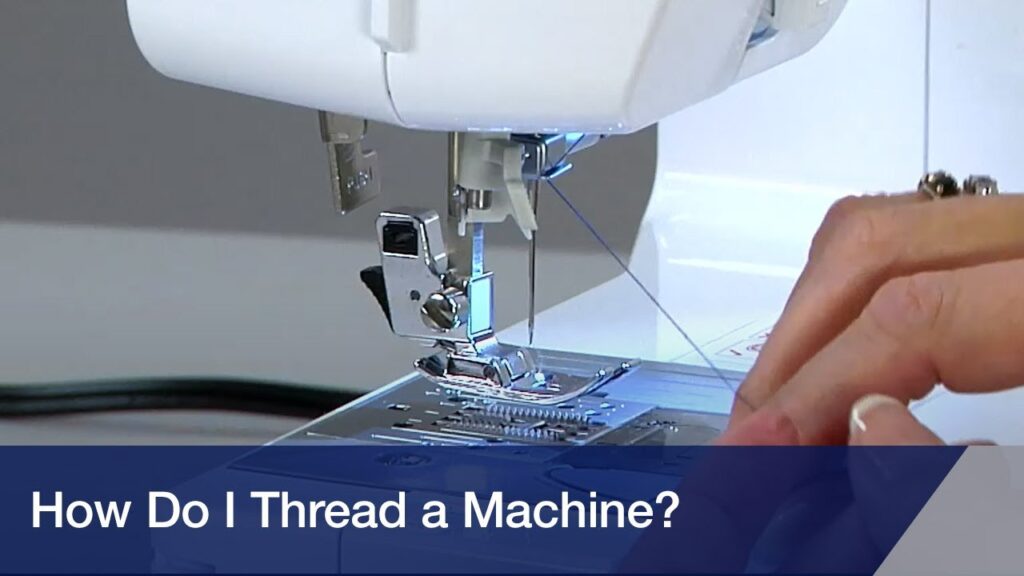
Threading the Needle
Threading a Brother sewing machine can seem daunting for beginners. First, it is important to understand the different types of needles available. Then, follow these simple steps to thread the needle: 1) Raise the needle using the hand wheel, 2) Hold onto the thread and pass it through the guide, 3) Pass the thread through the tension discs, 4) Thread the take-up lever, 5) Guide the thread through the remaining guides, and finally, 6) Thread the needle from front to back. With these instructions and a little practice, you’ll be able to thread your Brother sewing machine with ease.
Testing
Before starting any project on a Brothers sewing machine, it’s crucial to perform a test run to ensure everything is working correctly. Once you have threaded the needle and bobbin, turn on the machine and sew a test piece of fabric. Make sure the stitches are even and that the thread tension is correct. Don’t forget to test the different stitch options to ensure they work properly. By conducting a quick test run, you can avoid any potential issues when it comes time to sew your actual project. So, take a few minutes to test your machine before diving into your next sewing project.
Brother Sewing Machine: How to Thread Mechanical and Automatic Machines
Conclusion
Are you tired of struggling with threading your Brother sewing machine? Threading a sewing machine can be a frustrating task, especially if you’re new to the world of sewing. In this article, we’ll guide you through the step-by-step process of threading a Brother sewing machine and provide tips to make it easier. We’ll cover various important topics such as the tools you’ll require, directions for threading the machine, the importance of correct threading, and troubleshooting tips. By the end of this article, you’ll be able to confidently thread your Brother sewing machine and start creating beautiful designs. Don’t let the daunting task of threading your machine hold you back from creating beautiful garments and accessories. Let’s dive in and learn how to do it like a pro! At the end of this article, we’ll summarize the key points covered and emphasize the importance of knowing how to thread your Brother sewing machine correctly.
Frequently Asked Questions on How to Thread a Brother Sewing Machine

Meet Jeremy E. Hendley, a seasoned product review expert whose passion for technology, innovation, and consumer empowerment has propelled him to the forefront of the industry. With a keen eye for detail and an insatiable curiosity about the latest gadgets and innovations, Jeremy has become a trusted voice in the realm of product reviews.