Disclaimer: We may earn affiliate commission from qualifying purchases at no extra cost to you.
Introduction to Seam Allowance
Sewing can be a fun and rewarding hobby, but for beginners, it can also be overwhelming. Learning the different terminologies and techniques can be challenging, but one of the fundamental concepts to understand is seam allowance.
Definition of Seam Allowance
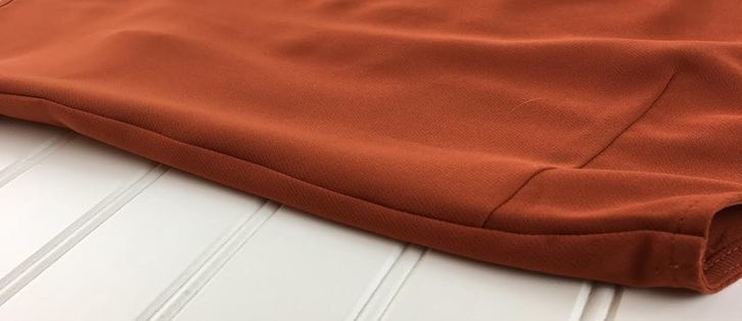
Seam allowance is the extra fabric that is added to the pattern pieces to allow for sewing the fabric together. It is the space between the edge of the fabric and the line of stitching. The standard seam allowance is 5/8 inch, but it can vary depending on the project.
Importance of Seam Allowance in Sewing
Seam allowance plays a vital role in sewing because it:
- Gives room for adjustments – It provides a bit of wiggle room for making adjustments to the fit or length of the garment.
- Prevents fraying – Seam allowance keeps the fabric from unraveling and adds stability to the edges.
- Gives a clean finish – By using the correct seam allowance and technique, your sewing project will have a neat and polished appearance.
- Helps in alterations – When a garment needs to be let out or taken in, having adequate seam allowance allows the seam to be let out or taken in without affecting the overall look of the garment.
Next time you are working on a sewing project, remember that the amount of seam allowance you use can make or break your final product. By respecting the standard seam allowance and understanding its importance, your sewing skills will take a significant step forward.
Types of Seam Allowance
Have you ever tried sewing a garment only to find that it doesn’t fit quite right? The problem may not be your sewing skills, but rather the seam allowance. What is seam allowance, you may ask? Seam allowance is the amount of extra fabric between the seam line and the raw edge of the fabric. Depending on the type of project, there are different types of seam allowances to consider. Let’s take a look at some of the most common types of seam allowance.
Standard Seam Allowance
The standard seam allowance is typically 5/8 inch or 1.5 cm. It is the most commonly used seam allowance and is suitable for most sewing projects. Keep in mind that if the pattern you are using does not specify a seam allowance, it is safest to assume a standard seam allowance. Here are some key points to remember about a standard seam allowance:
- Gives room for alterations and adjustments
- Standard seam allowances can vary depending on the project, so it’s important to pay attention to the pattern instructions.
Narrow Seam Allowance
A narrow seam allowance is typically 1/4 inch or 6 mm. It’s a great option for projects that require precise sewing, such as patchwork or quilting. Here are some key points to remember about a narrow seam allowance:
- Suitable for projects that require precise sewing
- Gives a cleaner and neater finish to the project
Wide Seam Allowance
A wide seam allowance is typically 1 inch or 2.5 cm. It is often used for projects that require alterations or adjustments, such as bridal gowns or tailored coats. Here are some key points to remember about a wide seam allowance:
- Gives flexibility for future alterations and adjustments
- Allows for wider seam finishing techniques, such as French seams or flat felled seams
Knowing the types of seam allowances and when to use them can help improve the fit and overall appearance of your projects. By taking the time to choose the right seam allowance for your project, you can achieve a professional-looking finish and avoid any potential fitting issues.
Measuring and Marking Seam Allowance
Seam allowance is a crucial element in sewing. It involves adding an extra amount of fabric around the pattern piece, allowing room for the seams to be sewn together. Measuring and marking seam allowance accurately is important in sewing, as it affects the overall outcome and fit of the garment. In this blog post, we will discuss the techniques and tools for measuring and marking seam allowance.
Importance of Accurate Measuring
Measuring the seam allowance accurately is essential in sewing for the following reasons:
- Helps to maintain the correct fit and shape of the garment.
- Prevents sewing errors, such as mismatched seams or distorted fabric.
- Ensures that the produced garment is of high quality and looks professionally made.
Tools for Measuring Seam Allowance
Here are some commonly used tools for measuring seam allowance:
- Seam Gauge: A small ruler with adjustable guides that indicates the seam allowance measurement.
- Measuring Tape: A flexible ruler used to measure the length and width of fabric.
- Stitch Guide Foot: A presser foot that ensures precise seam allowance measurements by guiding the fabric through the machine’s needle.
Techniques for Marking Seam Allowance
Marking the seam allowance accurately is crucial in sewing. Below are some popular techniques to mark the seam allowance:
- Chalk or Fabric Marker: Using a fabric marker or chalk to mark directly on the fabric ensures accurate measurements.
- Seam Tape: Sewing seam tape onto the fabric gives a perfect guide for sewing along the seam line.
- Notches: Cutting small notches into the fabric edge to mark the seam allowance is a popular technique, but care must be taken not to overcut.
In conclusion, measuring and marking seam allowance accurately is essential in sewing. Using the right tools and techniques can make the process easier and produce a high-quality garment.
Seam Allowance Considerations for Different Fabrics and Projects
Seam allowance is an essential aspect of sewing that is often overlooked by novice seamstresses. It refers to the extra fabric that surrounds the edges of a pattern piece and allows you to sew pieces together without the fabric unraveling. While some sewing projects may require a standard seam allowance, certain fabrics or designs may need more or less. In this blog post, we’ll explore the different considerations to keep in mind when determining seam allowances, focusing on light fabrics, heavy fabrics, curved edges, and zigzag or serger finish.
Light Fabrics
Lightweight fabrics, such as chiffon, silk, or organza, require delicate handling since they tend to fray easily. Consider incorporating the following seam allowance considerations when working with light fabrics:
- Choose a narrower seam allowance of 1/4 inch to prevent puckering or distortion of the fabric.
- Trim the fabric edges after sewing to reduce bulk and avoid creating a noticeable seam.
- Use French seams, which encase the raw edges and create a neat finish, ideal for lightweight and see-through fabrics.
Heavy Fabrics
On the other hand, heavy or thick fabrics, such as denim, corduroy, or canvas, require more robust seam allowances to ensure durability and strength. Here are some seam allowance considerations for heavy or bulky fabrics:
- Use a wider seam allowance of 1/2 inch or more to accommodate the fabric’s thickness and avoid seam rips.
- Grade the seams, by trimming the fabric edges at different lengths, to reduce bulk and create a smoother finish.
- Finish the seams with zigzag stitches or overlock stitches to prevent fraying and unraveling.
Curved Edges
Curved edges, like neckline or armhole seams, require extra attention to ensure a smooth and even seam without any puckering or sagging. Here are some seam allowance considerations for curved edges:
- Use a narrower seam allowance of 1/4 inch and distribute the excess fabric evenly along the curve to ensure a smooth and contoured fit.
- Use notches on the pattern pieces to align the curved edges before sewing and avoid stretching the fabric while stitching.
- Clip the seam allowance along the curve at regular intervals to create a smooth and flat seam.
Zigzag or Serger Finish
Lastly, a zigzag or serger finish is an effective way to prevent fraying and create a clean edge on the fabric. Here are some seam allowance considerations when opting for a zigzag or serger finish:
- Trim the edges of the fabric before stitching to remove any uneven or excess fabric.
- Use a serger or zigzag stitch to create a secure and durable seam finish, especially on fabrics prone to fraying.
- Use a narrow overlock stitch to finish curved edges and avoid bulkiness on the seam allowance.
In conclusion, seam allowance plays a crucial role in the sewing process, and selecting the appropriate seam allowance can make a significant difference in the outcome of your project. By keeping in mind the various seam allowance considerations for different fabrics and projects, you can create a professional-looking garment that withstood the test of time.
Common Mistakes in Seam Allowance
Seam allowance is the area between the fabric’s edge and the stitching line. It allows us to join two pieces of fabric together without leaving any raw edges visible. In sewing, it’s crucial to add seam allowances to every pattern piece that will be sewn together. In this article, we will discuss some of the common errors that people make when dealing with seam allowances. Let’s take a closer look at each of them.
Forgetting to Add Seam Allowance
One of the most common mistakes in sewing is forgetting to add seam allowance. Seam allowance is not included in the pattern piece, so it’s up to the sewist to add it. Here are a few things to keep in mind:
- Before cutting the fabric, check the pattern instructions to see the seam allowance required.
- Set up your sewing machine to the appropriate seam allowance.
- Use a seam gauge to measure the correct seam allowance.
Not Measuring Accurately
Measuring accurately is an essential part of sewing, regardless of the project’s complexity. Here are some helpful tips to avoid this mistake:
- Before starting, ensure that your measuring tools are precise and well-maintained.
- When measuring, use a straight ruler or a curved measuring tape, depending on the pattern’s contours.
- Measure twice to ensure accuracy.
Cutting Seam Allowance Incorrectly
Cutting the fabric too small for the seam allowance can result in an unwanted mistake. Here are some things to keep in mind when cutting:
- Add extra space for seam allowances when laying out your pattern pieces.
- Before cutting, double-check to ensure that you’re in line with the pattern’s instructions.
- Use a rotary cutter or scissors to cut the fabric accurately.
Not Making Adjustments for Alignment
Sometimes sewing projects require precise patterns that need to align in certain areas. The pattern’s alignment should be taken into account when adding the seam allowance. Here are some key points to remember:
- Keep in mind that the pattern’s alignment is crucial for a project’s success.
- Include the pattern’s seam allowance in every pattern piece before sewing.
- Use alignment marks that match for pattern pieces that must align.
In conclusion, by avoiding these common mistakes, sewists can significantly improve their overall sewing skills and complete their projects with ease. Remember to measure accurately, add seam allowance, cut properly, and adjust for alignment. With some patience and practice, you’ll be on your way to becoming a sewing expert in no time.
Adjusting Seam Allowance Width
Seam allowance is a significant component of sewing that plays a crucial role in the construction of a garment. It refers to the excess fabric between the stitching line and the cut edge.
Reasons for Adjusting Seam Allowance
Adjusting the seam allowance width can have several reasons. Here are a few:
- Your pattern may have a different seam allowance width than what you want to work with.
- You need to make modifications to the garment for a better fit.
- You want to conserve fabric and reduce bulk in certain areas.
- You need to adjust the seam allowance to accommodate certain sewing techniques, such as french seams or binding.
Reducing Seam Allowance
Reducing the seam allowance can be useful when you want to achieve a better fit, reduce bulk, or conserve fabric. Here’s how you can do it:
- Mark the stitching line on the wrong side of the fabric.
- Using a ruler or a seam gauge, measure and mark your desired seam allowance width from the stitching line.
- Cut off the excess fabric, leaving your new seam allowance width.
- Neaten the raw edge with a serger, zigzag stitch, or bias binding.
Increasing Seam Allowance
Increasing the seam allowance width can be beneficial when you want to make modifications to the garment or accommodate sewing techniques that require a larger seam allowance. Here’s how you can do it:
- Using a ruler or a seam gauge, measure and mark your desired seam allowance width from the stitching line.
- Cut off the excess fabric, leaving your new seam allowance width.
- Using a sewing machine or a serger, stitch along the new stitching line, encasing the excess fabric in the seam.
- Neaten the raw edge with a serger, zigzag stitch, or bias binding.
In conclusion, adjusting seam allowance width is a simple technique that can make a significant impact on the fit, function, and look of your garment. With a little practice and patience, you can master this skill and take your sewing projects to the next level.
How to Sew Seam Allowance
Have you ever wondered what seam allowance is and how it impacts your sewing projects? Seam allowance refers to the amount of fabric between the edge of the fabric and the stitching line. It is a crucial element in sewing as it can significantly affect the final outcome of your project. In this section, we will discuss how to sew seam allowance, including pinning, sewing with different stitches, and pressing.
Pinning Seam Allowance
Pinning is an essential step in sewing seam allowance. It helps to ensure accuracy, prevent shifting, and keep the fabric pieces together while sewing. Here are some key points to keep in mind when pinning seam allowance.
- Pin perpendicular to the seam line, and the pin should go through both fabric layers.
- Place pins about 1-2 inches apart.
- Pin outside the seam line and avoid pinning on the stitching line to prevent damage to your machine’s needle.
Sewing Seam Allowance with Different Stitches
The type of stitch you use can also have an impact on your seam allowance. Here are some stitches to consider and their corresponding seam allowances.
- Straight Stitch: This is the most common stitch used in sewing. The seam allowance for a straight stitch is usually ⅝ inch or 1.5 cm.
- Zigzag Stitch: A zigzag stitch is ideal for stretchy fabrics. The seam allowance for a zigzag stitch is usually ½ inch or 1.25 cm.
- French Seam: This type of seam gives a neat finish and is ideal for lightweight fabrics. The seam allowance for a French seam is usually ¼ inch or 0.6 cm.
Pressing Seam Allowance
Pressing your seam allowance correctly is crucial for achieving a professional-looking finish. Here are some tips on how to press seam allowance.
- First, press your seam flat to set the stitches.
- Next, open the seam and press it from the wrong side to ensure it lays flat.
- Use a pressing cloth to protect delicate fabrics from heat.
- If your fabric is bulky, trim the seam allowance and press it open to reduce bulk.
By following these techniques to pin, sew, and press your seam allowance, you can ensure a successful sewing project that looks polished and professional.
Techniques for Finishing Seam Allowance
Seam allowance is an essential part of any sewing project. It refers to the amount of extra fabric between the stitch line and the edge of the fabric. This additional fabric is necessary to prevent fraying and help create a neater and more professional look. In this blog post, we will explore various techniques for finishing seam allowance, including straight stitch/overcasting, zigzag finish, french seam, and bias binding.
Straight Stitch/Overcasting
One of the most commonly used techniques for finishing seam allowance is the straight stitch or overcasting. This technique involves using a straight stitch to sew along the seam line and then going over the raw edge of the fabric with a zigzag stitch to prevent fraying.
Key points:
- Use a shorter stitch length for the straight stitch to ensure that it secures the fabric properly.
- Use a zigzag stitch with a width of 3-5 mm and a length of 2-3 mm to secure the raw edges of the fabric.
- Trim the excess fabric close to the zigzag stitch to prevent bulkiness.
Zigzag Finish
Another technique for finishing seam allowance is the zigzag finish. This technique involves using a zigzag stitch along the edge of the fabric to secure it and prevent fraying.
Key points:
- Use a zigzag stitch with a width of 3-5 mm and a length of 2-3 mm to secure the raw edges of the fabric.
- Finish the seam allowance separately before sewing the seam to ensure that everything is secure and prevent any fraying.
- Trim the excess fabric close to the zigzag stitch to prevent bulkiness.
French Seam
The French seam is a popular technique used to completely enclose the seam allowance and create a neat finish. It is often used on lightweight or sheer fabrics and is suitable for straight seams.
Key points:
- Sew the fabric with the wrong sides facing each other, and then trim the seam allowance to 1/8 inch.
- Press the seam open and fold the fabric with the right sides facing each other.
- Sew the seam again with a 1/4 inch seam allowance to enclose the raw edge and create a neat finish.
Bias Binding
Bias binding is often used to finish the raw edges of the seam allowance on curved edges or areas that need a little more support. It is a strip of fabric that is cut on the bias and used to encase the raw edge.
Key points:
- Cut the bias binding to the desired length and width.
- Fold the binding in half lengthwise and press it.
- Pin the binding to the raw edge, right sides facing each other, and then sew it in place.
- Fold the binding over to the other side of the fabric and sew it in place.
In conclusion, finishing seam allowance is an important step in any sewing project. By using these techniques, you can create a neat and professional finish, prevent fraying, and add extra support when needed. Incorporate these techniques into your sewing repertoire, and you’ll be sure to elevate the quality of your projects.
Sewing Without Seam Allowance
Sewing is a fantastic hobby that allows you to create your own clothing and unique designs. However, it can be confusing to know the ins and outs of sewing, especially when it comes to understanding seam allowance. Seam allowance is the extra fabric between the edge of the sewing project and the stitch line. Most sewing projects require a seam allowance, but there are instances when sewing without seam allowance is necessary. Let’s explore when and how to sew without seam allowance using Markdown syntax with H3 headings (###).
When to Sew Without Seam Allowance
Sewing without seam allowance is not suitable for all sewing projects. However, there are times when it can be useful. Here are some situations where you might want to consider sewing without seam allowance:
- When creating a muslin or practice garment to test the fit before cutting into your final fabric.
- When working with knits or stretchy fabrics that don’t fray easily.
- When manipulating the fabric, such as when gathering or pleating, to reduce bulk.
Techniques for Sewing Without Seam Allowance
Sewing without seam allowance requires different techniques than sewing with seam allowance. Here are some tips for sewing without seam allowance:
- Use a smaller stitch length to ensure the seam holds up without the added strength of a seam allowance.
- Finish the edges of the fabric with a serger, zigzag stitch, or bias tape to prevent fraying.
- When sewing with knits or stretchy fabrics, use a stretch stitch or zigzag stitch so the seam can move with the fabric.
- Consider using a French seam to encase the raw edges of the fabric.
By adhering to these techniques, sewing without seam allowance can be a great way to achieve specific results. It’s essential to remember that it’s not suitable for every project, but it’s useful to have in your sewing arsenal.
Now that you have a better understanding of when and how to sew without seam allowance, you can confidently create a variety of garments and projects. Don’t be afraid to experiment with this technique to see how it can benefit your sewing endeavors.
What is Seam Allowance – Sewing Basics
Conclusion
Seam allowance is an essential term when it comes to sewing. It refers to the extra fabric that is added to the edges of pattern pieces to allow for sewing, finishing and cutting of the garment. Basically, it’s the distance between the cut edge of your fabric and the stitching line. Seam allowance may seem like a small detail, but it plays a significant role in the construction of a garment. In this article, we will discuss the summary of seam allowance importance and techniques, and how it enhances the quality and durability of a finished garment. We’ll explore various ways to utilize seam allowance properly, including how to measure and construct it using different types of seams. Lastly, we will discuss some final thoughts on the crucial role of seam allowance in the sewing process and how it can make a significant impact on the finished product. So let’s dive in and learn more about the importance of seam allowance in sewing.
Frequently Asked Questions for What is Seam Allowance: Understanding the Basics

Meet Jeremy E. Hendley, a seasoned product review expert whose passion for technology, innovation, and consumer empowerment has propelled him to the forefront of the industry. With a keen eye for detail and an insatiable curiosity about the latest gadgets and innovations, Jeremy has become a trusted voice in the realm of product reviews.